Featured News

Jumpshot V2 Range overview

Savage Range Overview

极速赛车|168极速赛车官方开奖结果(历史上的今天)开奖数据
-
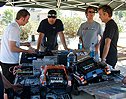
 AMain Distributing Now Distributing Maverick RC!
HPI Racing and AMain Distributing are excited to...
Read more
AMain Distributing Now Distributing Maverick RC!
HPI Racing and AMain Distributing are excited to...
Read more
-
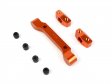 NEW Sport 3 Option Parts Now Available!
Now in stock!
We have added three new optional...
Read more
NEW Sport 3 Option Parts Now Available!
Now in stock!
We have added three new optional...
Read more
-
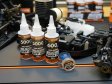 NEW Range of Pro-Series Silicone Oils and Grease
PRO-SERIES HEAVY-DUTY
SILICONE SHOCK & DIFF OIL...
Read more
NEW Range of Pro-Series Silicone Oils and Grease
PRO-SERIES HEAVY-DUTY
SILICONE SHOCK & DIFF OIL...
Read more
[普及分享]极速赛车168历史开奖结果 New Product Snapshot


Cool Stuff
New to HPI Racing / RC Cars?